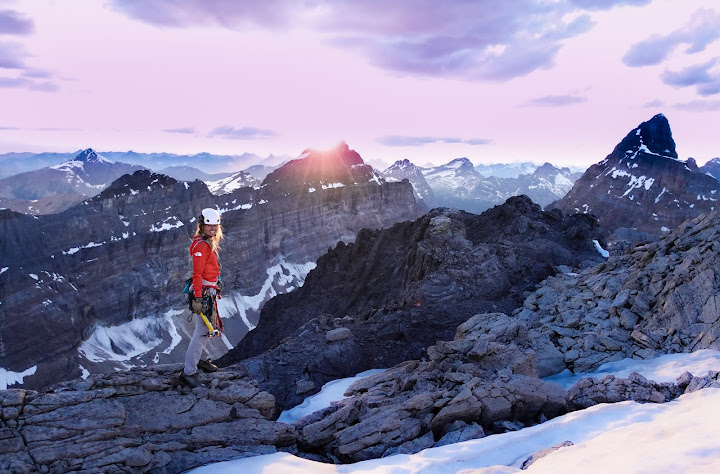
The Chinese Puzzle Wall, Chilliwack River Valley, BC


 |
| Hidden Dragon, 12c Topo (pitches 1-6) |
 |
| Hidden Dragon (pitches 7-11) |
 |
| Crouching Tiger, 12b Topo |
 |
| Manchu Wok (pitches 1-8) |
 |
| Manchu Wok (pitches 9-13) |
Approach:

Hidden Dragon 12c, 500m
Crouching Tiger 12b, 500m
8. Climb up the crack. At easier ground clip a bolt on the left and make a few moves across a slab to reach a steep right-facing corner. Belay at the ledge (one bolt and #2) 12a, 30m
Pitches 9- 11:
Park at the Mt. Slesse Trailhead. Follow the trail towards Mt. Rexford. The trail steepens as it ascends through a first growth forest (30-40 mins). As the trail enters the old growth forest hike for about 5 minutes and keep an eye out for green flagging on the left hand side. (The first one is also marked by an old tin reflector pinned to a tree). Follow the green flagging as it sidehills up through the old growth forest with a constant incline upwards (30mins). Cross two gullies of alders. The second alder gully climbs up a few steps of rock, then exits on the left. A few moves of down climbing and traversing lead to a slab traverse. Traverse the slabs to access the gully. (fill up with water here). Climb up the slabs to the base of the climbs. Keep your eye out for fixed lines to avoid wet slabs.

Hidden Dragon 12c, 500m
- Follow the granite tufa past two bolts. Place a .5 Camelot into the obvious slot in the dike after the second bolt. Corners and cracks lead back to the tufa. Clip a bolt and traverse left into a left-facing corner. Belay at the ledge. One bolt plus gear. 12c, 45m
- Climb right-facing corner on immaculate black granite. Make a gear belay at a comfortable stance(#3, #4). 12b, 30m
- Continue up the right-facing corner and into the roof (may be wet). Exiting the roof, climb the right-facing corner to a bolted belay. 12b, 35m
- An overhanging and gravely chimney leads into a short off-width and blocky climbing. Pull a difficult boulder problem to enter the right-facing corner, then traverse rightward onto flakes and face cracks. Belay at a stance #1’s, 12b, 30m.
- The Mirage Corner. Climb up the chimney and into a left-facing corner. Belay at the ledge with one bolt and .75. 12b, 30m
- A powerful traverse leftward leads into a right-facing corner. Climb the corner then traverse back leftward into a left-facing corner. Climb past a tree into a chimney grove and belay on a small stance with one bolt and .3. 11c, 35m
- A right-facing corner leads into overhanging hand crack then into a technical left-facing stemming corner. Make a gear belay where the corner eases into a slab stance. 12b, 35m.
- Traverse across the slab to enter into a powerful right-facing corner. Belay near the tree at a single bolt and #2. 12a, 30m
- Climb up a gentle ramp around the right corner. One bolder move (bolt protected) leads into a thoughtful traverse back left. Gear belay 11b, 40m.
- 5th class tree climbing following the line of least resistance. 35m
- Easy but unprotected slab to an 11- boulder roof traverse. Belay at a tree.
Gear:
Singles in Blue alien, #3, #4
Doubles from .3- #2
Doubles in large offset wires
Singles in small wires
Decent:
From the final tree belay look directly across to find a large wire placement and bolt. Rappel down the slabs to the lookers left to a bolted rappel station. 20m. Rappel down overhang to reach the bolted rappel stations for Hidden Dragon. (Can be done with two 60m ropes, but some rappels will reach the ropes full extent.)
From the final tree belay look directly across to find a large wire placement and bolt. Rappel down the slabs to the lookers left to a bolted rappel station. 20m. Rappel down overhang to reach the bolted rappel stations for Hidden Dragon. (Can be done with two 60m ropes, but some rappels will reach the ropes full extent.)
Crouching Tiger 12b, 500m
Crouching Tiger climbs a central line up the Chinese Puzzle Wall. It is named for its prominent orange stripped corner on pitch 4. Marc-André and I planned on climbing this line together after we established the first ascent of the wall via Hidden Dragon 12c, in 2016. Caro North, Chris Kalman and I, completed Crouching Tiger, 12b+, 500m, 2018. Its eight pitches link into the the upper three pitches of Hidden Dragon.
1. Start up the central crack system. Pass through blocky roofs to gain a ledge stance. Belay by slinging a large block. 11a, 30m
2. A tricky boulder problem leads into a left-facing corner. Beware as the left wall becomes hallow, place thin gear in a seam around the arête to avoid the flake. Continue up the corner to a small rooflet and pull around the arête to a bolted belay. 11a, 20m
3. Climb the technical stemming corner past two bolts. Follow the crack that splits the wall on the right. Traverse out the roof to the right then follow the crack to a bolted belay at a stance. 12a/b, 30m
4. The Tiger Stripe. From the belay move right up cracks then traverse leftward to reach the left-facing corner with the orange stripe. Belay in the chasm with one bolt plus gear. 11a, 30m
5. Follow the wide corner as it narrows down to hand size through a series of roofs. Belay at the ledge (One bolt, plus gear). 11b, 30m
6. Start up the chimney passing a tree on the left. Climb an overhanging crack through blocky terrain. Traverse rightward and build a gear belay below the slab. 10c, 40m
7. A few moves up gravely rock lead into a left-facing corner. Climb the relentlessly flared corner past three bolts, placing thin gear intermittently. Bolted belay. 12b, 25m
Pitches 9- 11:
- Climb up the wide cracks at 5.9 to reach a crux boulder problem (reach dependent). Traverse left on thin crack and technical gear, 11b, 40m.
- 5th class tree climbing following the line of least resistance, 35m.
- Easy but unprotected slab to a 5.11- boulder roof traverse. Belay at Tree.
Gear:
Decent:
Manchu Wok 12d, 500mStandard double rack, plus wires. Triples in #1 and #2. One #4 and #5. Offset cams in the smaller sizes could be helpful. (The #5 is not necessary if your comfortable running it out on easy terrain on pitch 5.)
Decent:
Rappel Hidden Dragon.
From the base scramble up the scree to the lookers-right to find a small ledge. Traverse leftward to reach the prominant tree.
- Begin at the tree and climb to a stance under a thin seam. A tricky boulder problem leads to continuous climbing. At mid hight step right then continue up to gain easier ground around large boulders. A down leaning traverse leads to a bolted belay at a prominent ledge. 5.11, 30m.
- A series of corners and ledge traverses lead to a bolted stance 10a, 20m
- Technical climbing leads into ever-powerful boulder sequences. Bolted belay at a stance. 12d, 30m
- Hand jam up the overhanging double cracks. Bolted belay at a stance under a roof. 5.11, 25m
- A wide corner leads through a small roof then continues upward to a bolted belay at a ledge. 5.11, 20m
- A short traverse leads to a single bolt stance. 5.9, 8m (Can link with Pitch 5)
- A wide corner leads through a roof and into a chimney with a face crack on the left. Climb to a bolted belay at a ledge. 11-, 25m
- Step up and left to gain a left-facing corner. This leads into a large chimney and out through a large roof. Belay at a stance above the roof.5.11, 25m
- Fun climbing up a chimney leads to a thin grove. Belay at the tree. 5.10, 25m
- Step right and climb up to a ledge. Traverse leftward and over a large block. Continue the leftward traverse which feeds into a short downclimb and further traversing. Belay at a ledge where a bolt is placed. 5.10 ,20m
- Tricky boulder move leads to a leftward slab traverse and into a fun finger crack. Belay at the ledge. 11-, 20m
- The tree pitch. 5.8
- The roof pitch. 10+
Gear:
Decent:Standard double rack (.3- #4)
Set of wires.
Rappel Hidden Dragon.